Showing posts with label Payment Getaway. Show all posts

Saturday, July 26, 2014

Android Paypal Gateway Example | Paypal demo in android | Pay inside App using Paypal and Credit card


Hi Friends, in past we were using third party library for Paypal payment but now Paypal provide us their own library for payment so it is now much secure and easy to implement in our application. Below are the important step to do -


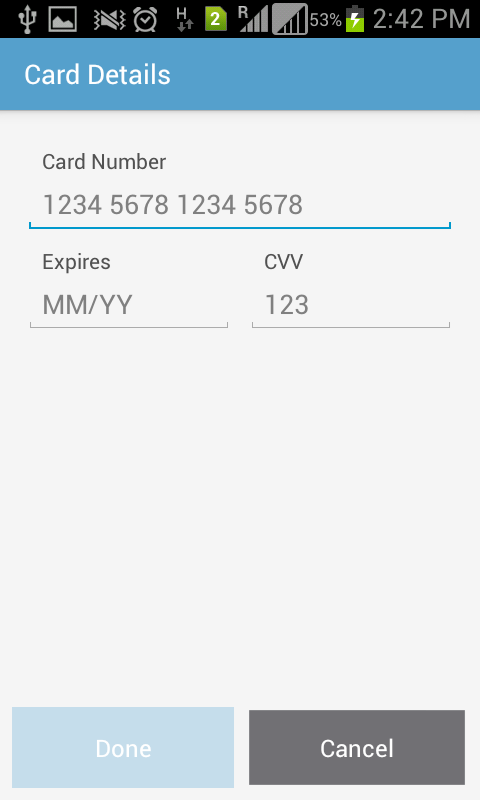

1)First go through Paypal Developer web site and create an application.

2)Now open your manifest file and give the below permissions-

<uses-permission android:name="android.permission.INTERNET" />

     <uses-permission android:name="android.permission.ACCESS_NETWORK_STATE" />


3)And some required Activity and Services-

<service
            android:name="com.paypal.android.sdk.payments.PayPalService"
            android:exported="false" />

        <activity android:name="com.paypal.android.sdk.payments.PaymentActivity" />
        <activity android:name="com.paypal.android.sdk.payments.LoginActivity" />
        <activity android:name="com.paypal.android.sdk.payments.PaymentMethodActivity" />
        <activity android:name="com.paypal.android.sdk.payments.PaymentConfirmActivity" />
        <activity android:name="com.paypal.android.sdk.payments.PayPalFuturePaymentActivity" />
        <activity android:name="com.paypal.android.sdk.payments.FuturePaymentConsentActivity" />
        <activity android:name="com.paypal.android.sdk.payments.FuturePaymentInfoActivity" />
        <activity
            android:name="io.card.payment.CardIOActivity"
            android:configChanges="keyboardHidden|orientation" />
        <activity android:name="io.card.payment.DataEntryActivity" />


4)Open your Activity class and set Configuration for your app-
//set the environment for production/sandbox/no netowrk
       private static final String CONFIG_ENVIRONMENT = PayPalConfiguration.ENVIRONMENT_PRODUCTION;


5)Now set client id from the Paypal developer account-
     private static final String CONFIG_CLIENT_ID = "PUT YOUR CLIENT ID";


6)Inside onCreate method call the Paypal service-
Intent intent = new Intent(this, PayPalService.class);
        intent.putExtra(PayPalService.EXTRA_PAYPAL_CONFIGURATION, config);
        startService(intent);


7)Now you are ready to make a payment just on button press call the Payment Activity-
PayPalPayment thingToBuy = new PayPalPayment(new BigDecimal(1),"USD", "androidhub4you.com",
                                 PayPalPayment.PAYMENT_INTENT_SALE);

                             Intent intent = new Intent(MainActivity.this, PaymentActivity.class);

                             intent.putExtra(PaymentActivity.EXTRA_PAYMENT, thingToBuy);


                             startActivityForResult(intent, REQUEST_PAYPAL_PAYMENT);    


8)And finally from the onActivityResult get the payment response-
  @Override
           protected void onActivityResult(int requestCode, int resultCode, Intent data) {
               if (requestCode == REQUEST_PAYPAL_PAYMENT) {
                   if (resultCode == Activity.RESULT_OK) {
                       PaymentConfirmation confirm = data
                               .getParcelableExtra(PaymentActivity.EXTRA_RESULT_CONFIRMATION);
                       if (confirm != null) {
                           try {
                           System.out.println("Responseeee"+confirm);
                               Log.i("paymentExample", confirm.toJSONObject().toString());

                            
                               JSONObject jsonObj=new JSONObject(confirm.toJSONObject().toString());
                              
                               String paymentId=jsonObj.getJSONObject("response").getString("id");
                               System.out.println("payment id:-=="+paymentId);
                               Toast.makeText(getApplicationContext(), paymentId, Toast.LENGTH_LONG).show(); 

                           } catch (JSONException e) {
                               Log.e("paymentExample", "an extremely unlikely failure occurred: ", e);
                           }
                       }
                   } else if (resultCode == Activity.RESULT_CANCELED) {
                       Log.i("paymentExample", "The user canceled.");
                   } else if (resultCode == PaymentActivity.RESULT_EXTRAS_INVALID) {
                       Log.i("paymentExample", "An invalid Payment was submitted. Please see the docs.");
                   }
               }
              
               
         }


For any query or suggestion please post your feedback.

Thanks,


Tuesday, March 26, 2013

How to Inegrate In App Purchase Billing in Android : In App Purchase Demo In Android : Billing Services in Android : Payment Getaway in Android

Hello Friends!
Today I am going to share very useful blog for In App Purchase in Android. Google provide In App Billing faculty in Android. In App Purchase is a very easy and secure way for make payment online.
Please follow my blog step by step-

Screen Shot:


1)Create a new Project in Android.
2)Create MainActivity.java class.
3)Add activity_main.xml in your res/layout folder.
4)Add Billing services and permission in Manifest.xml.

                   Do's

1)Create sign apk for your application.
2)Upload your apk on Google play store.
3)Create product for your application.
4)wait for 6-12 hour for update item's on store.
5)Copy Key of your Google account and paste it into BillingSecurity.java class Line number 135-
String base64EncodedPublicKey = "PUT YOUR PUBLIC KEY HERE";
6)Give Billing permissions in Manifest.xml
7)Add IMarketBillingService.java in com.android.vending.billing package.

                   Don't

1)Don't use emulator for testing its does not support Billing Services.
2)Don't use unsigned apk for Billing services.
3)Don't share your key with any one.

My Code-

1)MainActivity.java

package com.manish.inapppurchase;

import android.app.Activity;
import android.content.Context;
import android.content.Intent;
import android.os.Bundle;
import android.os.Handler;
import android.util.Log;
import android.view.View;
import android.view.View.OnClickListener;
import android.widget.Button;
import android.widget.Toast;

public class MainActivity extends Activity implements OnClickListener {
Button btn1, btn2, btn3;
private Context mContext=this;
private static final String TAG = "Android BillingService";
@Override
protected void onCreate(Bundle savedInstanceState) {
super.onCreate(savedInstanceState);
setContentView(R.layout.activity_main);
btn1 = (Button) findViewById(R.id.button1);
btn2 = (Button) findViewById(R.id.button2);
btn3 = (Button) findViewById(R.id.button3);
btn1.setOnClickListener(this);
btn2.setOnClickListener(this);
btn3.setOnClickListener(this);

startService(new Intent(mContext, BillingService.class));
       BillingHelper.setCompletedHandler(mTransactionHandler);
}
public Handler mTransactionHandler = new Handler(){
public void handleMessage(android.os.Message msg) {
Log.i(TAG, "Transaction complete");
Log.i(TAG, "Transaction status: "+BillingHelper.latestPurchase.purchaseState);
Log.i(TAG, "Item purchased is: "+BillingHelper.latestPurchase.productId);

if(BillingHelper.latestPurchase.isPurchased()){
showItem();
}
};

};
@Override
public void onClick(View v) {
if (v == btn1) {
if(BillingHelper.isBillingSupported()){
BillingHelper.requestPurchase(mContext, "android.test.purchased");
       } else {
        Log.i(TAG,"Can't purchase on this device");
        btn1.setEnabled(false); // XXX press button before service started will disable when it shouldnt
       }
Toast.makeText(this, "Shirt Button", Toast.LENGTH_SHORT).show();
}
if (v == btn2) {
if(BillingHelper.isBillingSupported()){
BillingHelper.requestPurchase(mContext, "android.test.purchased");
       } else {
        Log.i(TAG,"Can't purchase on this device");
        btn2.setEnabled(false); // XXX press button before service started will disable when it shouldnt
       }
Toast.makeText(this, "TShirt Button", Toast.LENGTH_SHORT).show();
}
if (v == btn3) {
if(BillingHelper.isBillingSupported()){
BillingHelper.requestPurchase(mContext, "android.test.purchased");
       } else {
        Log.i(TAG,"Can't purchase on this device");
        btn3.setEnabled(false); // XXX press button before service started will disable when it shouldnt
       }
Toast.makeText(this, "Denim Button", Toast.LENGTH_SHORT).show();
}

}

private void showItem() {
//purchaseableItem.setVisibility(View.VISIBLE);
}

@Override
protected void onPause() {
Log.i(TAG, "onPause())");
super.onPause();
}

@Override
protected void onDestroy() {
BillingHelper.stopService();
super.onDestroy();
}
}

2)activity_main.xml

<RelativeLayout xmlns:android="http://schemas.android.com/apk/res/android"
    xmlns:tools="http://schemas.android.com/tools"
    android:layout_width="match_parent"
    android:layout_height="match_parent"
    android:background="#0099CC"
    tools:context=".MainActivity" >

    <Button
        android:id="@+id/button1"
        android:layout_width="150dp"
        android:layout_height="35dp"
        android:layout_alignParentTop="true"
        android:layout_centerHorizontal="true"
        android:layout_marginTop="40dp"
        android:background="#FFFFFF"
        android:text="Shirt for 5.4$" />

    <Button
        android:id="@+id/button2"
        android:layout_width="150dp"
        android:layout_height="35dp"
        android:layout_below="@+id/button1"
        android:layout_centerHorizontal="true"
        android:layout_marginTop="10dp"
        android:background="#FFFFFF"
        android:text="Tshirt for 7.4$" />

    <Button
        android:id="@+id/button3"
        android:layout_width="150dp"
        android:layout_height="35dp"
        android:layout_below="@+id/button2"
        android:layout_centerHorizontal="true"
        android:layout_marginTop="10dp"
        android:background="#FFFFFF"
        android:text="Denim for 10.7$" />

</RelativeLayout>


3)manifest.xml

<?xml version="1.0" encoding="utf-8"?>
<manifest xmlns:android="http://schemas.android.com/apk/res/android"
    package="com.manish.inapppurchase"
    android:versionCode="1"
    android:versionName="1.0" >

    <uses-sdk
        android:minSdkVersion="7"
        android:targetSdkVersion="16" />

    <uses-permission android:name="com.android.vending.BILLING" />
    <uses-permission android:name="android.permission.INTERNET" />

    <application
        android:allowBackup="true"
        android:icon="@drawable/ic_launcher"
        android:label="@string/app_name"
        android:theme="@style/AppTheme" >
        <activity
            android:name="com.manish.inapppurchase.MainActivity"
            android:label="@string/app_name" >
            <intent-filter>
                <action android:name="android.intent.action.MAIN" />

                <category android:name="android.intent.category.LAUNCHER" />
            </intent-filter>
        </activity>

        <service android:name=".BillingService" />

        <receiver android:name=".BillingReceiver" >
            <intent-filter>
                <action android:name="com.android.vending.billing.IN_APP_NOTIFY" />
                <action android:name="com.android.vending.billing.RESPONSE_CODE" />
                <action android:name="com.android.vending.billing.PURCHASE_STATE_CHANGED" />
            </intent-filter>
        </receiver>
    </application>

</manifest>

4)Zip Code


For any help or suggestion please comment on my blog :)-

Thanks,